Flash Animation Tutorials: Animate for broadcast.

Hello and welcome to FLASHARTIST.

Today I will demonstrate how to create some cool collage type character animation using Flash CS3.

this is the example movie I will be using for this tutorial.

The first step is to create your collage character in a photo editing software such as Photoshop or Firework. you need to break down the character in separate layer for each body part.  as shown below

ElephantManpart

Go to Flash and create a new document 720×576 / 30 frame per seconds  ( broadcast setting )
ELEPHANT_TUTO_1

Locate and import your layered document to stage .

ELEPHANT_TUTO_2

Make sure your character is  layered  with each part of the character on separate layers,

head

torso

leg left

leg right

arm left

arm right

ELEPHANT_TUTO_3

Once imported on stage  each body part should be on a separate flash layer

ELEPHANT_TUTO_4

Now select the head and press F8 to convert it into a Movieclip
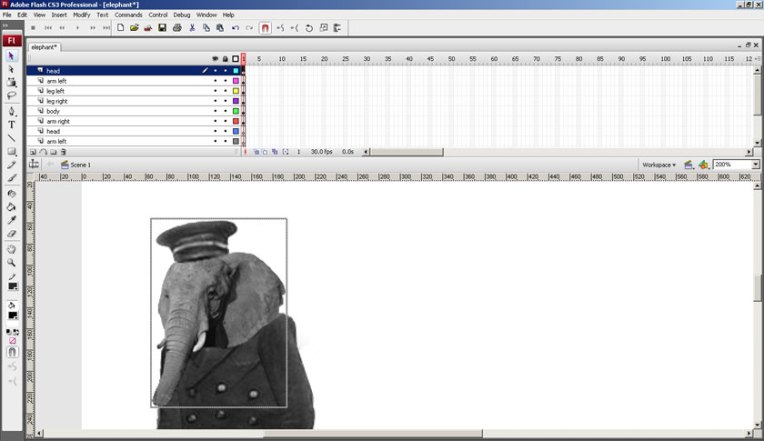
ELEPHANT_TUTO_5

– Name the movie clip HEAD and select the FREE TRANSFORM tool.

– Click and drage the IK point to the most realistic rotation  point (around the neck area)

ELEPHANT_TUTO_7

Using the FREE TRANSFORM you can rotate the head side to side and locate where you feel is the best IK point.

ELEPHANT_TUTO_9

Repeat the same operation for each body parts; the arms, the  legs and the torso. replacing the IK point as required for each .

ELEPHANT_TUTO_10

ELEPHANT_TUTO_11

Once done , select all the keyframe copy and paste them in a new MovieClip that you can name Walkcycle.

ELEPHANT_TUTO_12

Once all the layer are in the new Movieclip go to frame 10 and insert a keyframe for each layer.

Go over the timeline RightClick and create a Motion Tween for each layer.

ELEPHANT_TUTO_14

That’s it! Now the fun bits, the character is now ready to be animated using the FREE TRANSFORM tool.

ELEPHANT_TUTO_15

Here is a bit of walk cycle reference.

walkcycler

Getting a walk cyle right is one of the trickiest thing to get right in animation, as a guideline for this example make sure that the first and last frame of the walkcycle are the same so that it  loops seamlessly . you can use the onion skin tab to help with the animating.

walkcycle

You should get something like that

Now to create the background, in this example I have created a deck scene out of recycled images, the trick to simulate movement is to make it super wide to scroll / pan  from one end of the scene to the other.

Make a new MovieClip and import your background image, convert it into another MovieClip and using tweening animate your backgound from left to right.

DECK

ELEPHANT_TUTO_17

Finally Go to the main stage and compose your scene using the 2  movieClips of the walk cycle and the animated background

ELEPHANT_TUTO_18

Once you are happy with your animation publish as a quicktime file for further editing.

download all the project files here


Flash Cs4 bone tool

I am having a great time with the new FLASH CS4 BONE TOOL , here is an animation project started a while ago & I was waiting for the incredible new animation tools of Flash Cs4 to bring it to life , here are a few pix showing how the bones are applied and some animated test video of the character in action. A full bone tutorial will be on FLASHARTIST.ORG very soon. In the meantime all I can say is that Flash animators will enjoy the new version of Flash more than the previous updates for all these new features.

shaolinn_1


shaolinn_2shaolinn_3

How to Create a Cartoon in Flash ?

Cartoon Character design in flash


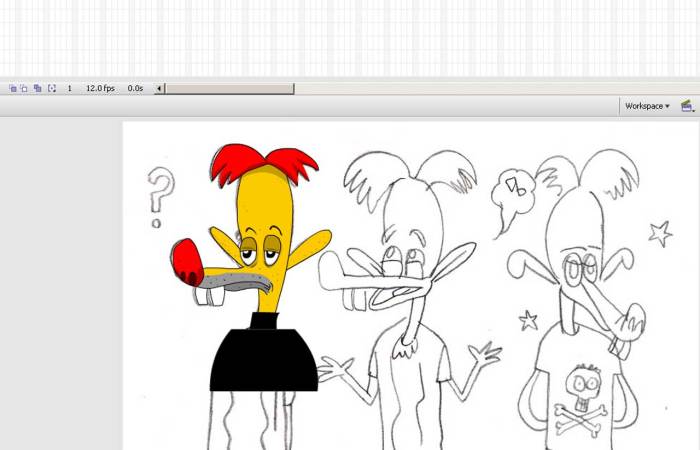
The following step by step tutorial describes how to create a vector based cartoon character in flash from a hand drawn concept.

your cartoon character once created will be ready to be animated in flash or after effects for a web or broadcast animation project.

For this tutorial you will need

a wacom tablet & Flash CS3


  • Step 1:

start with pen and paper to create your character.

  • Step 2:

Scan artwork / hand drawn character.

  • Step 3:

Open flash / create a new scene (eg:800X800) and import scanned image onto the timeline

file/import/import to stage

(if necessary convert your scanned file .tiff into a .jpeg)

  • Step 4:

Lock the layer containing your drawing and mouse right click the layer to turn it into a guide.

Now create a new layer to start drawing !

  • Step 5:

Look into your tool panel and choose how to draw your character, there are several ways to do this and obtain different line style , you can use your wacom tablet and draw free hand using the brush (click the brush tool to adjust settings)

In this example we are going to use the bezier tool (the one that looks like a fountain pen). if you click over the bottom right corner of this tool you will notice a drop down menu including 4 selectable options:

  • open tool
  • add anchor
  • delete anchor
  • convert anchor

  • Step 6:

Go around the head with the pen tool, left click to insert anchors in corners or delete anchors using back arrow key.

Check out shortcuts shown next to the tools (in brackets) .

Now using the free tool, adjust the lines over artwork tracing .

  • Step 7:

Repeat the same tracing principles for each items of your character,

Make sure that you create a new layer for each elements of the composition ( head, ears, eyes, mouth etc..)

if you hide the layer used as a guide you should see how is the compositon coming together.

  • Step 8:

Once all your outlining is done , you can start the coloring of your character , closed up shape can be filled up using the bucket.

if you run into trouble filling up shape because there they aren’t fully closed use the gap size tool , this could help.

Step 9:

open the color tab and experiment with gradient to give volume to your shapes.

In the color tab Select type:linear

you can add as many key as needed in your color grading.

Control the angle/spread of the gradient using the toolbox gradient tool (3rd from top, see below)

  • Step 10:

Draw the eyes (only the white no pupils at this stage) select your eye layer and click F8 / click ok to convert into symbol. the eyes will be nested within a symbol as it will contain the pupils, the eyelids and the various eye states (open closed etc..)

As before within the eye symbol, create a new layer for each item (eyelid, pupil etc)

  • Step 11:

Draw the Eye brow , press F8 /click OK to convert into a symbol.

Draw the Mouth , press F8 /click OK to convert into a symbol.

( once the shape are color filled you can add / clear the black outline around the drawing if needed )

  • Step 12:

Now bring the finishing touch using the wacom pen and tablet, add details , shade etc..

  • Step 13:

Zoom out to see the whole picture and amend your drawing if necessary.

  • Step 14:

Et voila ! from your original pencil drawing you now have a vector version in color and broken down to symbols.

Ready for the next step of flash animation.

the next tutorial will show how to move onto the next step, hopefully using Flash CS4 (some really cool animation tools are coming with the new version…)

I will show how to animate using

  • IK and inverse kinematics
  • nested symbols containing the various state (mouth phonemes , eye states, eye brow position etc..)
  • and much more..

FlashArtist.

How to Create a custom flv player

Welcome to FlashArtist.org 10 steps tutorial on how to make your very own flv player in flash CS3,

Step 1 :

Open :
C:\Program Files\Adobe\Adobe Flash CS3\en\Configuration\FLVPlayback Skins\FLA\ActionScript 2.0\

Step 2:

Select one of the ready made player template, for this tutorial we will be using

ClearExternalPlaySeekMute.fla

Step 3:

Edit / modify the Play button etc.. convert each graphic into your own.

Step 4:

Once all the graphic are converted save the .Fla and export the swf file in this folder .
C:\Program Files\Adobe\Adobe Flash CS3\en\Configuration\FLVPlayback Skins\ActionScript 2.0

I have named my custom player MyCustomPlayer.swf

Step 5:

Create a new fla to insert your video

Step 6:

Select video from hard drive

Step 7:

Select encoding quality

Step 8:

Select now your custom player skin MyCustomPlayer.swf

Step 9:

That’s it ! your video now use your very own custom made flv player.

Step 10:

You can now publish and see you custom player in action!